CS First Activities

Last year we did some CS First activities. These will lead up to the Hour of Code, which is next week, December 9th-13th. Set up a new account and complete the Interactive Presentation activity. 

Detailed instructions are also below

  1. Copy this code: 5th = sbb82d, 4th = zrfjrf3rd = bsnf67, 2nd = gw37p6
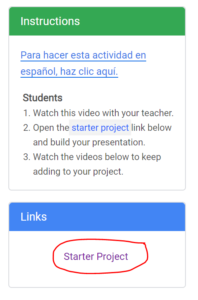
  2. Click on the link on the right.
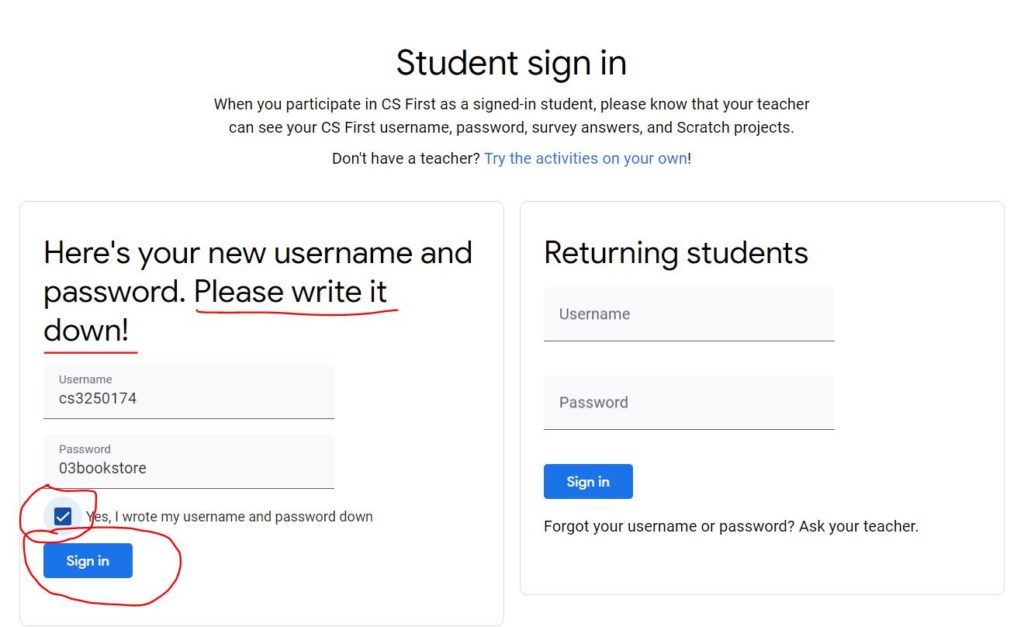
  3. Click sign in
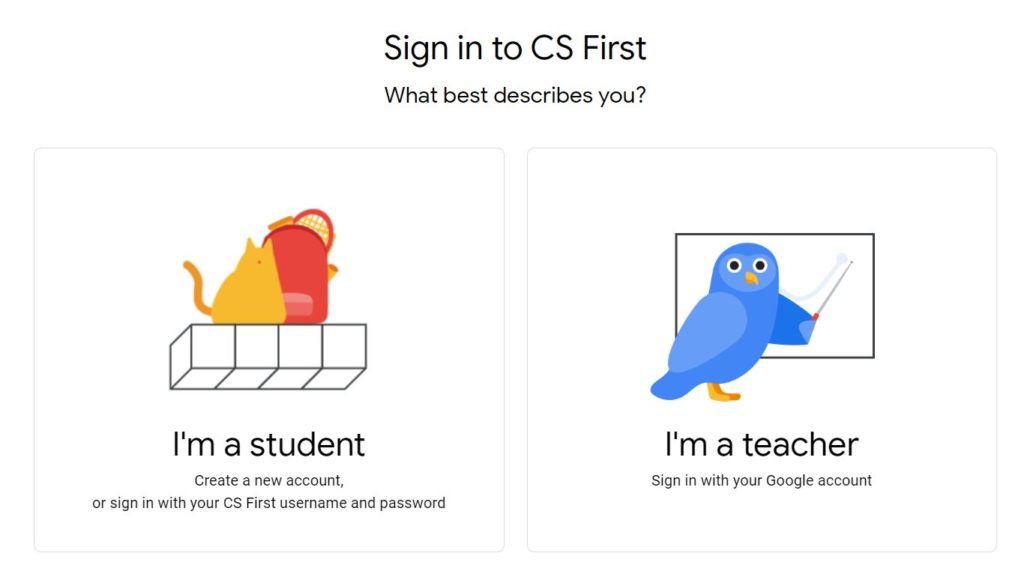
  4. Choose “I am a student”
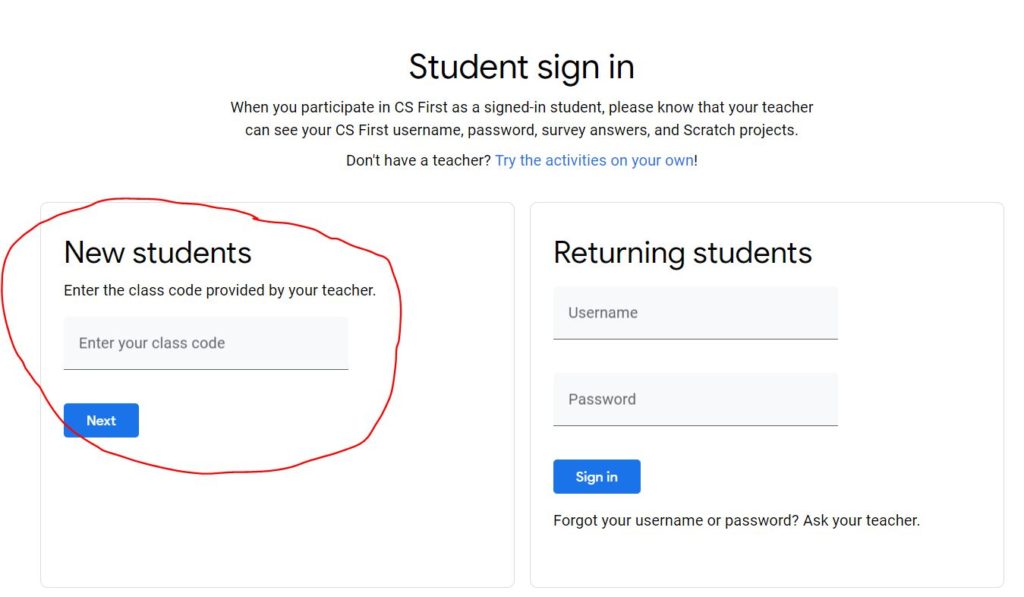
  5. Enter the code: 5th = sbb82d, 4th = zrfjrf3rd = bsnf67, 2nd = gw37p6
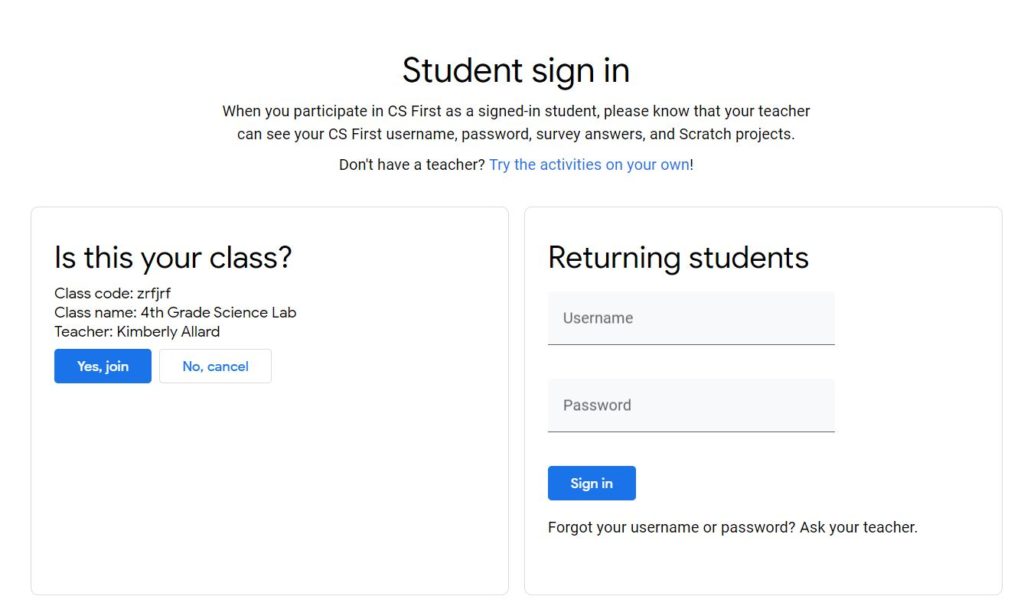
  6. Click, “yes, join” (make sure it says the right class first)
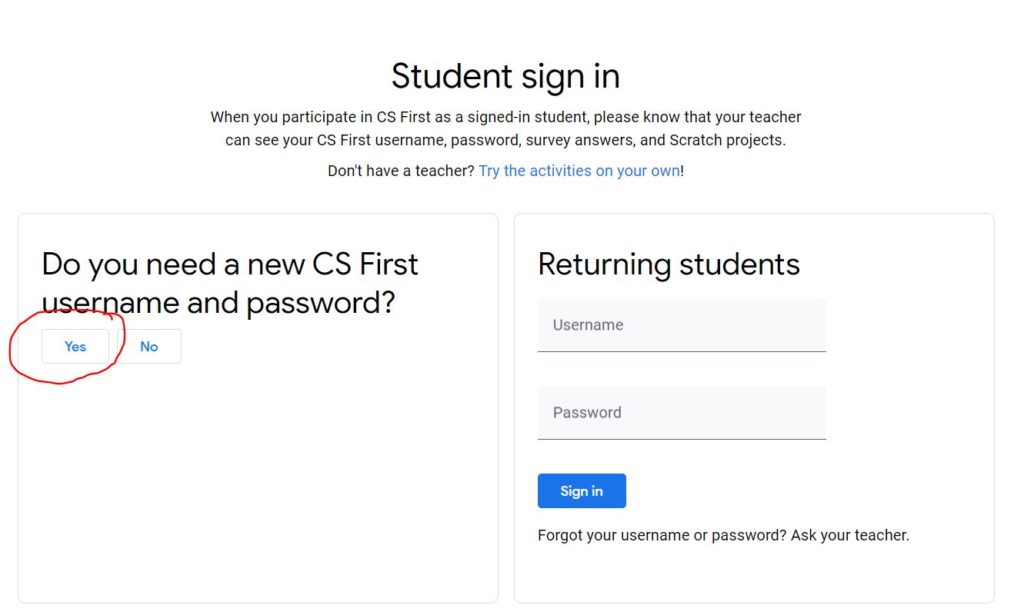
  7. When it asks if you need a new password, click “yes”
  8. Write down your username and password on an index card with your name and turn it in to the teacher
  9. Use the “snip” tool to take a picture of your username and password and save it to your computer.
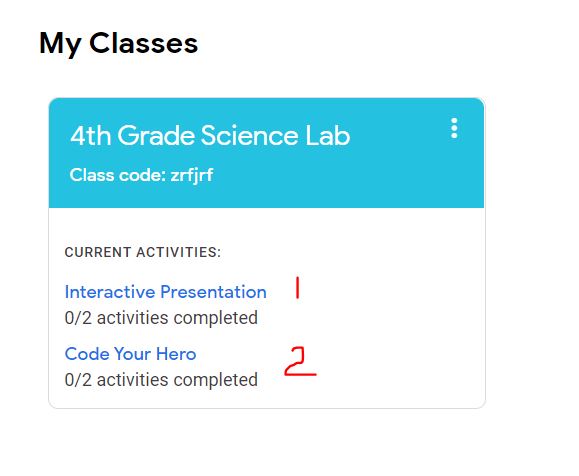
  10. Start the first activity – Interactive Presentation, or Dialogue
  11. IF you finish that activity, start the second activity Code Your Hero
Step
1

Select
“I’m a student”

Step
2

Enter your class code.

  • 5th Grade = sbb82d
  • 4th Grade = zrfjrf
  • 3rd Grade = bsnf67
  • 2nd Grade = gw37p6

Click “Next”

Step
3

Confirm your class and click “yes, join”.

    Step
    4

    Request a new username and password, even if we made one last year.

      Step
      5

      Write down on an index card:

      1. Your first and last name
      2. Your room #
      3. Your username
      4. Your password
      5. Double check 
      6. Give card to the teacher

      Also, use the “SNIP” tool to take a screenshot of your username and password and save it to your computer.

        Step
        6

        Start the first activity “Interactive Presentation”

        2nd Grade is doing 
        “Dialogue”

          Step
          7

          Click on Interactive Presentation, then START

            Step
            8

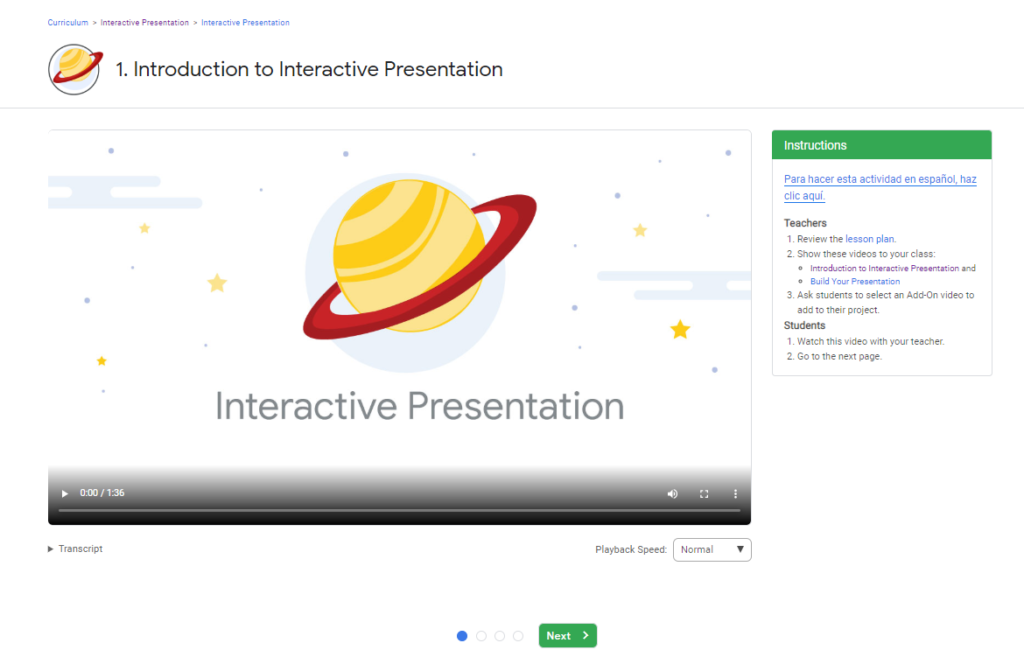
            Watch the two videos.

              Click the next button at the bottom.

                Step
                9

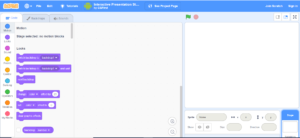
                Click the starter project link.

                  Step
                  10

                  Start working on the starter project. Go back an re-watch videos if you need directions.

                    IF you have an account, you can log in to Scratch. 

                    Do NOT set up an account yet if you don’t have one. 

                    Google Sites

                    Today we are going to get started creating a Google Site. Google sites is ONE way to create a website.

                    You are going to start with a site all about something you know really well – YOU!

                    Your site will have these pages:

                    • Home (Titled with your name)
                    • Family
                    • Favorites
                    • Hobbies
                    • School Work
                    • one special page 

                    Google Sites

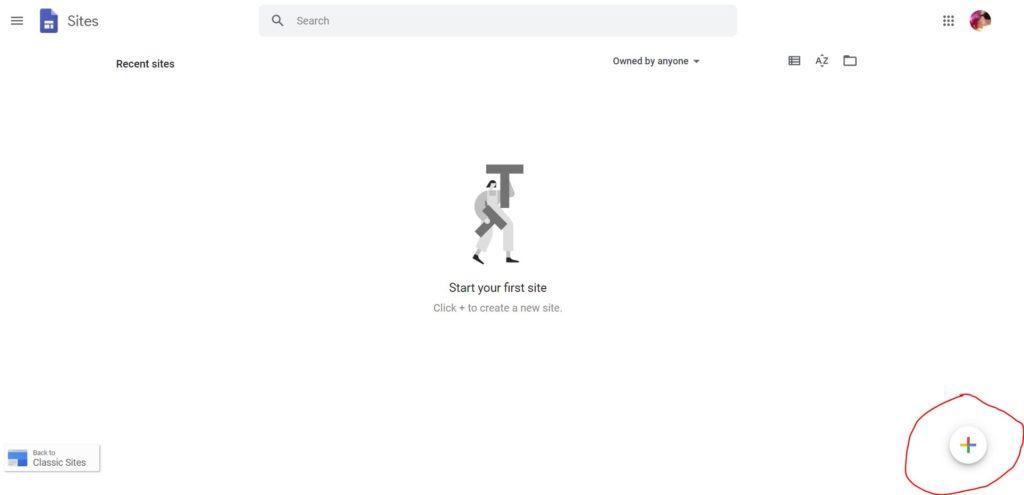
                    Click her to go to Google Sites. Then click the + sign to get started.

                    STEP 1

                    Click on the plus sign to get started.

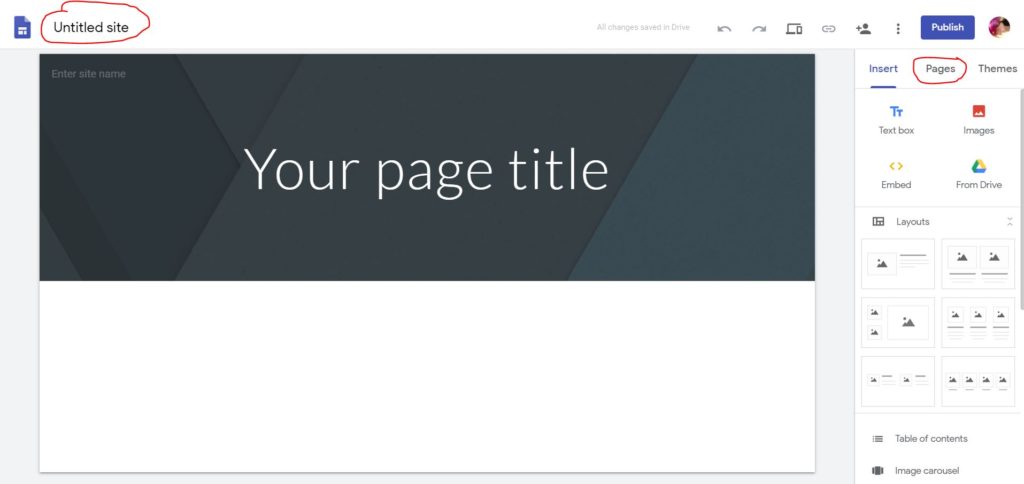
                    STEP 2

                    Click on “untitled site” and change it to your first name and last name. This is your “home” page. 

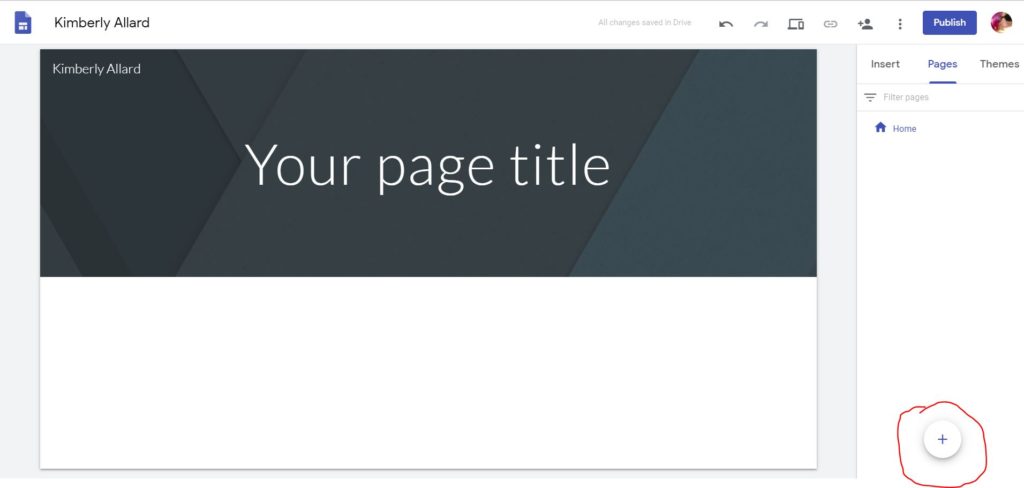
                    STEP 3

                    Click first on Click on the plus sign to create a new page.

                    STEP 4

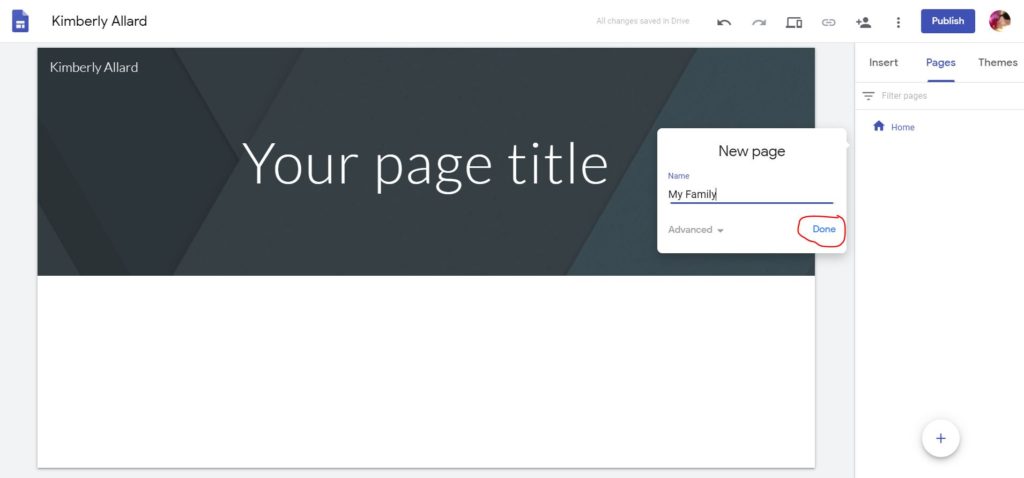
                    After clicking the plus sign, enter a title for your page. We are going to create a page called “My Family”. Then click done. 

                    STEP 5

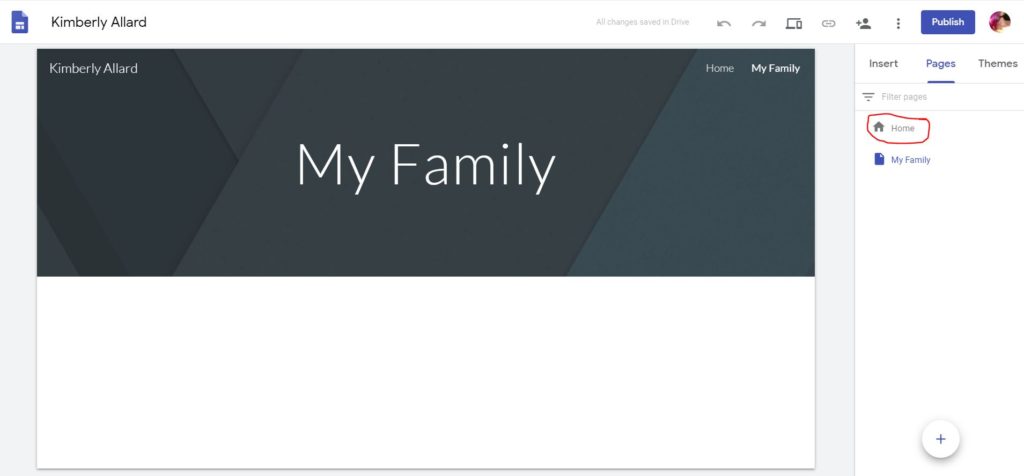
                    Click on the title and name it “My Family.” 

                    STEP 6

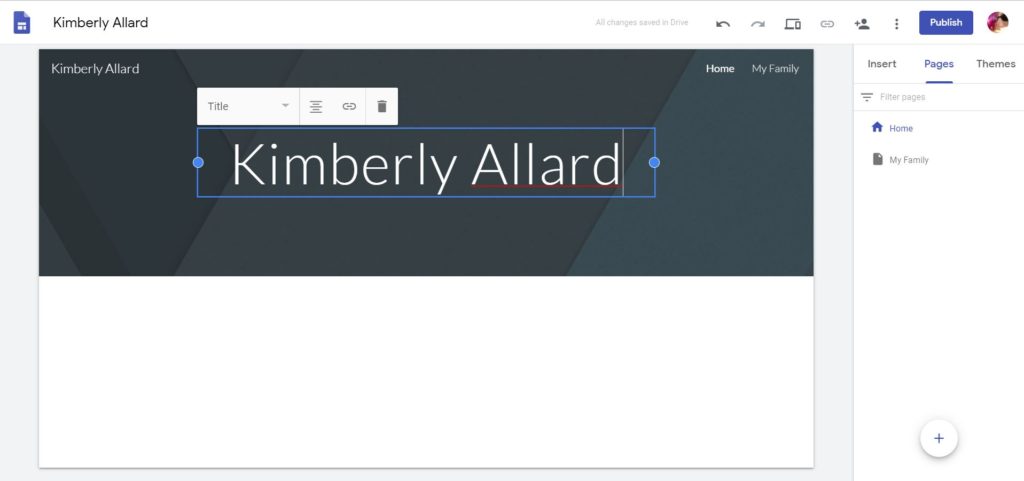
                    Click on the title and type in your first and last name.

                    STEP 7

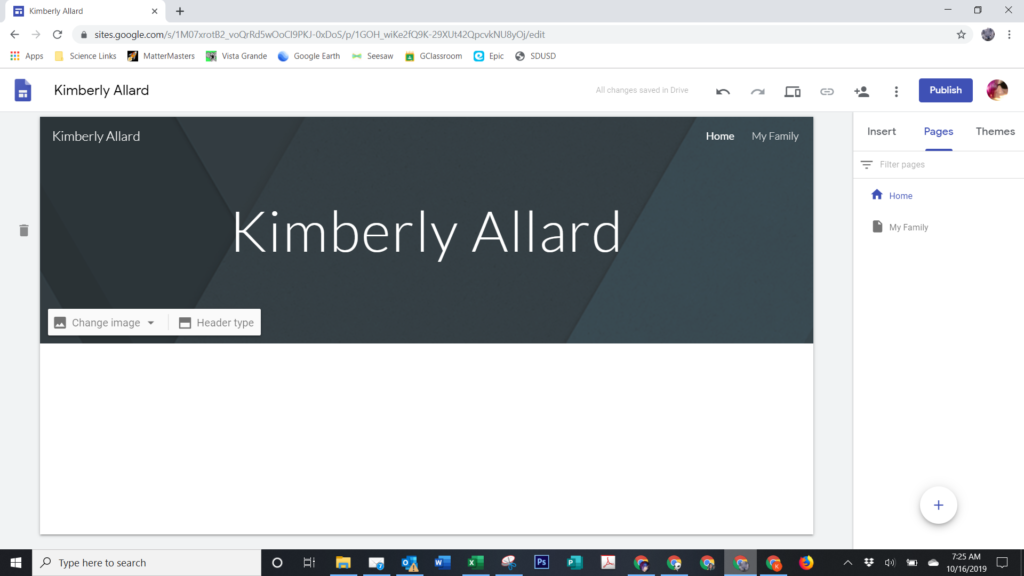
                    Hover over the title background and a menu will pop up that says “change image” and “header type”. Click on “Change image.” 

                    STEP 8

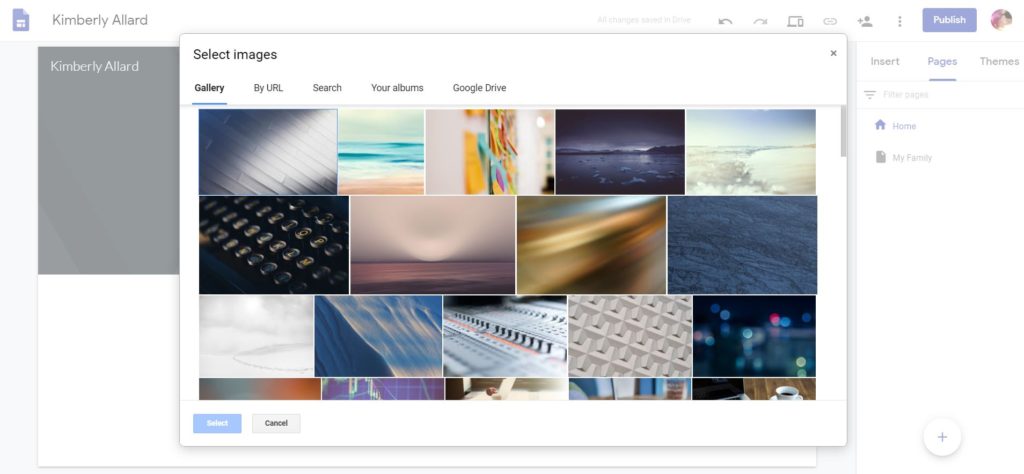
                    Click on “select image” – don’t worry about uploading at the moment. We can play with that later. A new screen will pop up that looks like the one below. The first option is “gallery” – stick with that for now. Pick an image in the gallery.

                    STEP 9

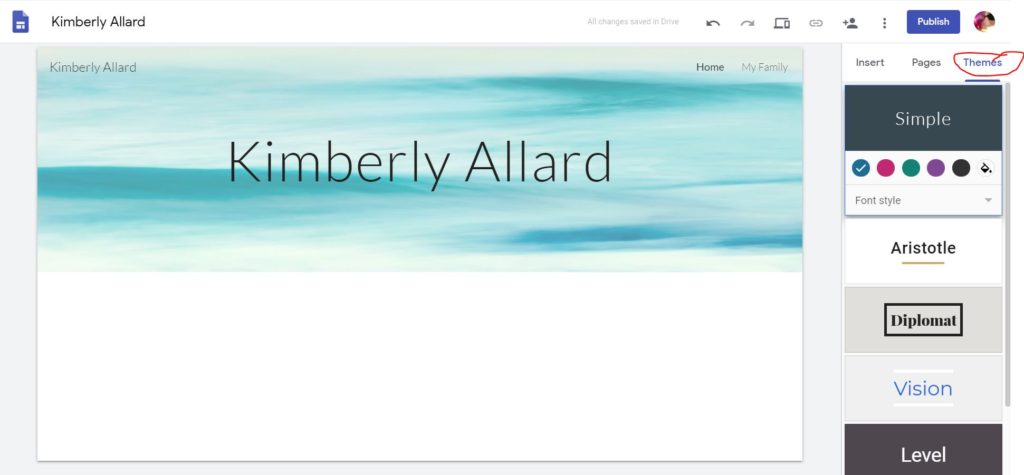
                    Click on “themes” and click on a theme until you find one that you like.

                    STEP 10

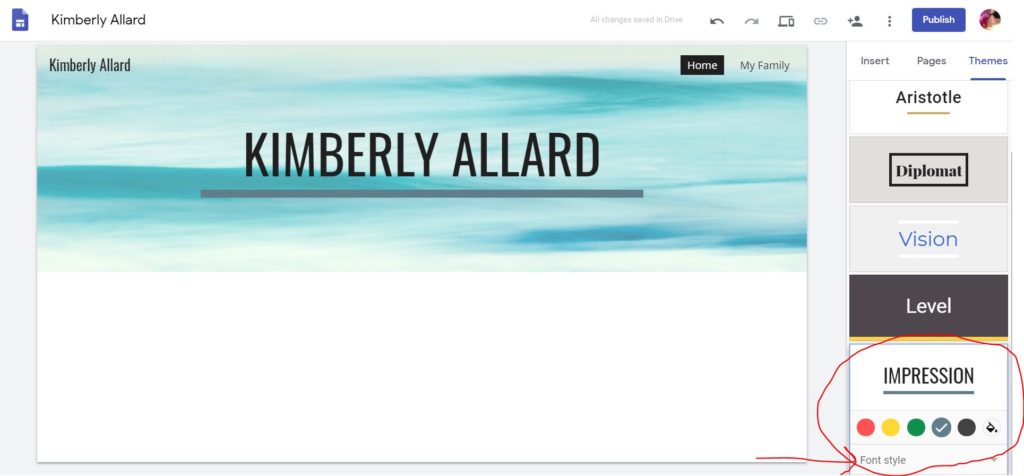
                    After you pick your theme, you can also choose a color to go with your theme, and also choose a font. Unfortunately there aren’t as many font choices in Google Sites as there are in Google Slides. 

                    STEP 11

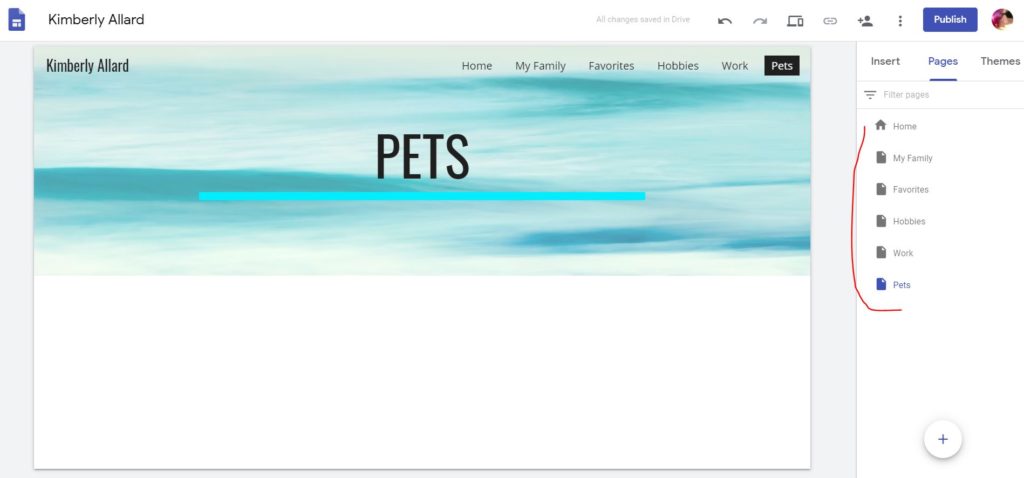
                    Create 4 more pages for your site:

                    • Favorites
                    • Hobbies
                    • School Work
                    • your choice page

                    After you create these new pages, you can start filling in information on each page. Start with your “Home” page. The home page is going to be about you. Introduce yourself. Tell how old you are, where you live, just a little bit about yourself. You will use the other pages to give more details. 

                    For the “your choice page” – pick another topic you would like to include on your site. 

                    STEP 12

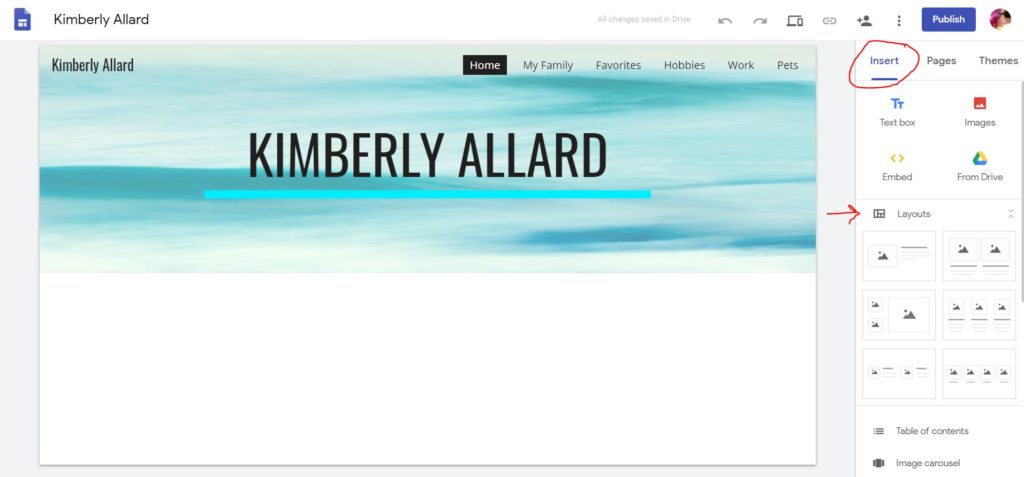
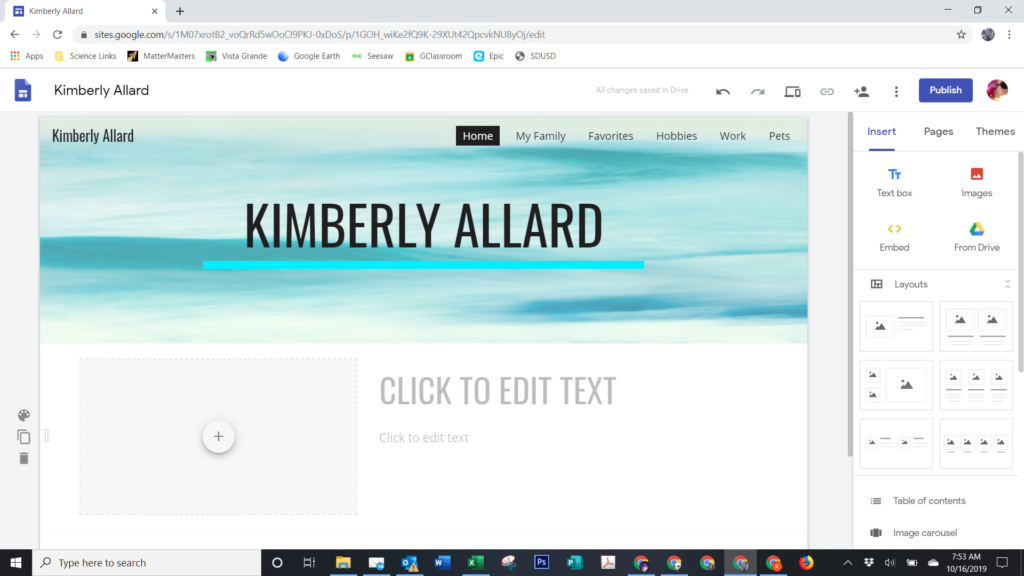
                    Begin putting in content. Star with your home page, and then go to the other pages and add stuff. Click on “insert” and then choose a layout. You can click on the layout or drag and drop.

                    STEP 13

                    The rest is pretty self-explanatory. There is a palette to choose some colors, etc., Double page means you can duplicate. Trash can means to get rid of that section.

                    Links

                    Common Sites we Use

                    Google Classroom

                    1. Use Chrome if it is installed on your computer.
                    2. You should already be logged in to Google. If not, you need to login to Google by using your student ID number (the same one you use to login to your computer) and @stu.sandi.net (example: [email protected]) and then enter your password.
                    3. Go to the nine squares at the top and click.
                    4. Click on “classroom”
                    5. Find the Science Lab and click join. some of you have already done this. Others need to.

                    SeeSaw

                    1. Click on the SeeSaw link above (or in Google Classroom). 
                    2. Click “login” – top left corner. NOT sign up.
                    3. Select “I am a student”
                    4. Select Login in with Google account. Do NOT enter/type any information in on that screen – no email, name, etc. All you have to do is click on the top link to use your Google account. 
                    5. IF it asks for a code, the code is: TYFM JVXG
                    6. Once you are in, you are done. Just want to make sure you can get in. You can close all of the tabs for SeeSaw.

                    Canvas

                    1. This is a new thing we will try.
                    2. Click on the link above. Or, in Google Classroom, the one that says “Sign in”
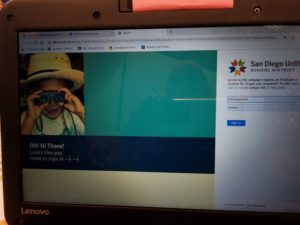
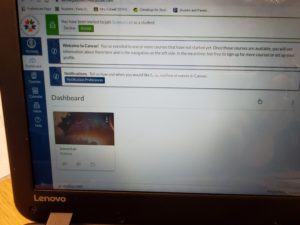
                    3. You will see a screen that looks like the one below. It should put in your user id and password (same one used to login to your computer) for you, but if not, enter it. 
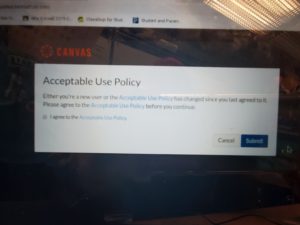
                    4. It will pop up another screen where you have to agree by checking the box, and then clicking the button.
                    5. If you are able to get in, then you will see the third screen. 
                    6. That’s it. Now that you have checked on Google Classroom, SeeSaw, and Canvas, you can now click on the Interland link and play the game. 

                    Ozobots on Ozoblockly

                    Agenda

                    1. Join your grade level Google Classroom using the join code. We are combining classes. Links are in Google Classroom, but here as well.
                    2. Learn the basics of using Ozoblockly
                    3. Calibrate an Ozobot on the computer, which is a little different than doing it on paper.
                    4. Learn how to “Flash Load” (or load the program) your Ozobot
                    5. Try out Task 1 – Square Walk
                    6. Try out Task 2 – Dance Lesson
                    7. If there is extra time, try your own programming
                    8. Fill out the Exit Slip survey

                    Keep this tab with these instructions open, then open Ozoblockly in a separate tab.

                    Use the Google Slides below to teach yourself about Ozoblockly and how to program Ozobots using the computer.

                    Pair Programming Video

                    Ozoblockly Intro Tutorial